Once the AI Assistant is enabled, connect an AI assistant using your Connection URL. The login and consent happen automatically through OAuth 2.1 — there is no API key to copy by hand. The connecting user must have the manage_woocommerce capability (Administrator or Shop Manager role).
Step 1 — Copy your Connection URL
In WooCommerce → Shipment Tracking → AI Assistant → AST MCP, click Copy next to Your link. It looks like this:
https://your-store.com/wp-json/zorem-mcp/v1/mcpStep 2 — Add it as a connector
Claude (claude.ai — browser and mobile)
- 1Open claude.ai and go to Settings → Connectors.
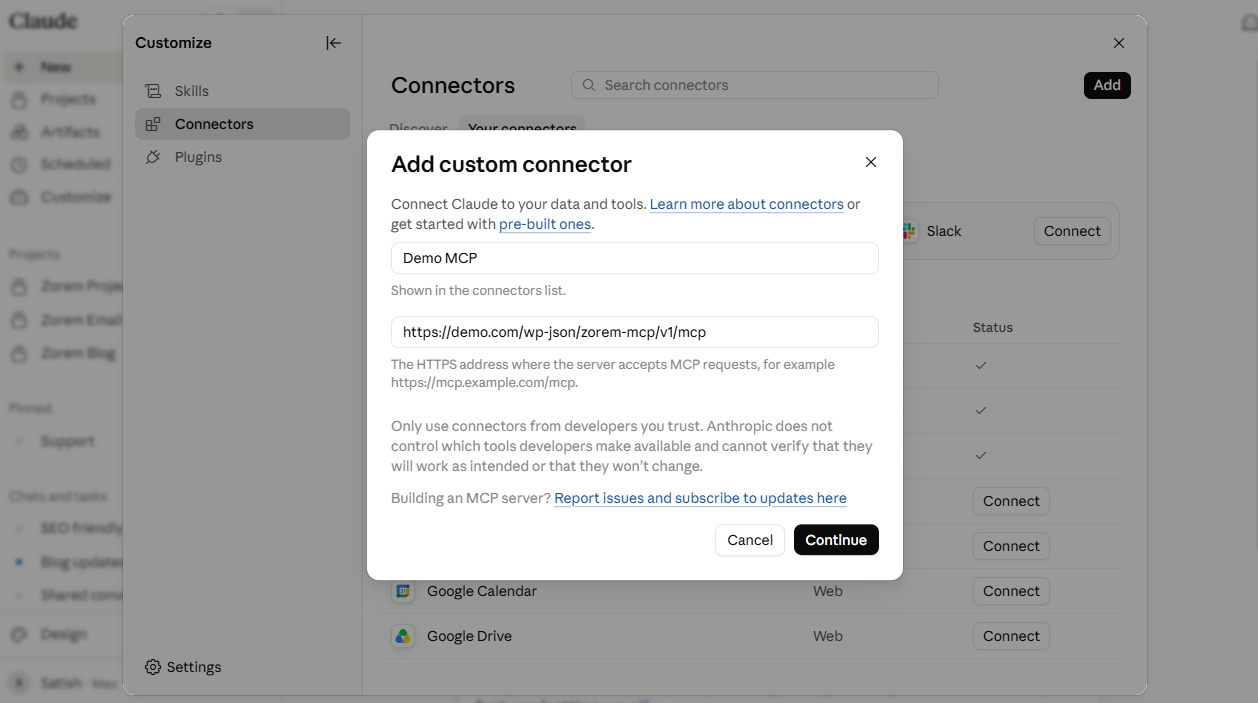
- 2Click Add custom connector.
- 3Give it a name (for example, Shipment Tracking) and paste the Connection URL into the address field.
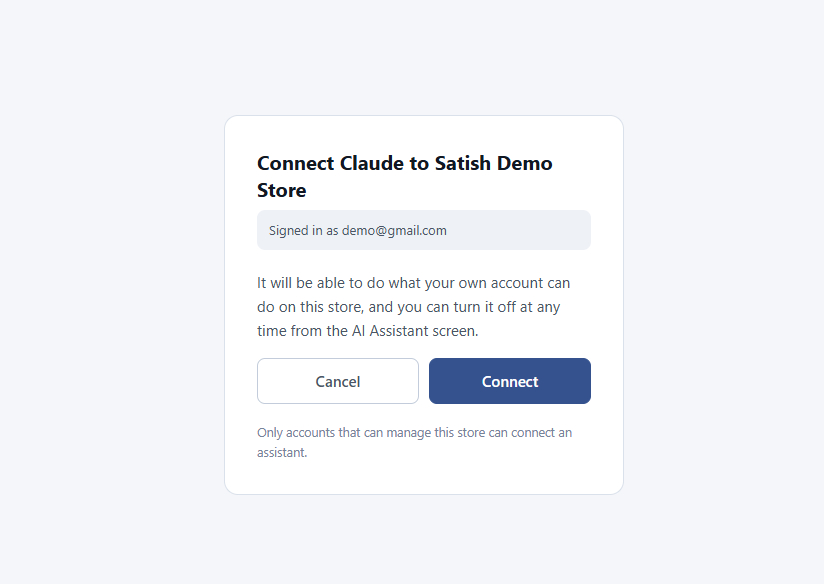
- 4Click Continue then Add. Claude checks the server, then opens your store’s login page.
- 5Log in with your normal store account and click Allow to approve access. You are returned to Claude with the connector active.
- 6Confirm it worked: ask Claude “Which orders are missing tracking?” — it should return results from your store.
ChatGPT
In ChatGPT, go to Settings → Connectors (or Custom connectors, depending on your plan) and paste the same Connection URL. The login and consent flow is identical to Claude. Note: custom connectors require a ChatGPT plan that supports them.
Claude Desktop and Cursor
Desktop clients use the WooCommerce MCP route with a WooCommerce API key instead of the Connection URL. See WooCommerce MCP for setup instructions.
Step 3 — Start chatting
You can now say things like:
- “Which orders are missing tracking?”
- “Add FedEx tracking 781299388123 to order #1234.”
- “How many orders went out by USPS last week?”
- “What’s the tracking on order #1230?”
The assistant acts as your store account and can only do what that account can do. Every action is logged in the Audit Log.
Disconnecting or revoking access
To disconnect a specific AI assistant, go to AI Assistant → AST MCP → Who is connected and click Revoke on that row. The token is invalidated immediately. Removing the connector inside the AI app is not sufficient on its own — revoke it here too.
To disconnect everyone at once, click Sign everyone out.
Troubleshooting
If the connection fails at Step 2, see Troubleshooting the AI Assistant — the most common causes are the toggle being off, a security plugin blocking the REST API, or an OAuth redirect error.