This guide walks you through integrating ShipStation with Advanced Shipment Tracking (AST) PRO, allowing you to automate the process of syncing tracking information and updating order statuses in WooCommerce.
🔄 How the Integration Works
To connect your WooCommerce store with ShipStation, you must install the official ShipStation for WooCommerce plugin. This plugin enables the synchronization of WooCommerce orders with your ShipStation account.
Once installed and connected:
- Orders with the Processing status are synced to ShipStation
- When you generate a shipping label in ShipStation:
- A note is added to the WooCommerce order with the shipping carrier, tracking number, and tracking link
- The order status is updated to “Completed”
However, ShipStation does not update AST’s shipment tracking fields directly. As a result, customers do not receive the tracking widget in their shipping confirmation emails.
✅ What AST PRO Does
The ShipStation integration in AST PRO solves this issue by:
- Automatically extracting the tracking number and carrier from the order note.
- Saving it to AST’s Shipment Tracking Order Meta.
- Updating the order status to Shipped (optional).
- Triggering the shipping confirmation email with the AST tracking widget.
This ensures tracking details appear in customer emails and on the My Account > View Order page.
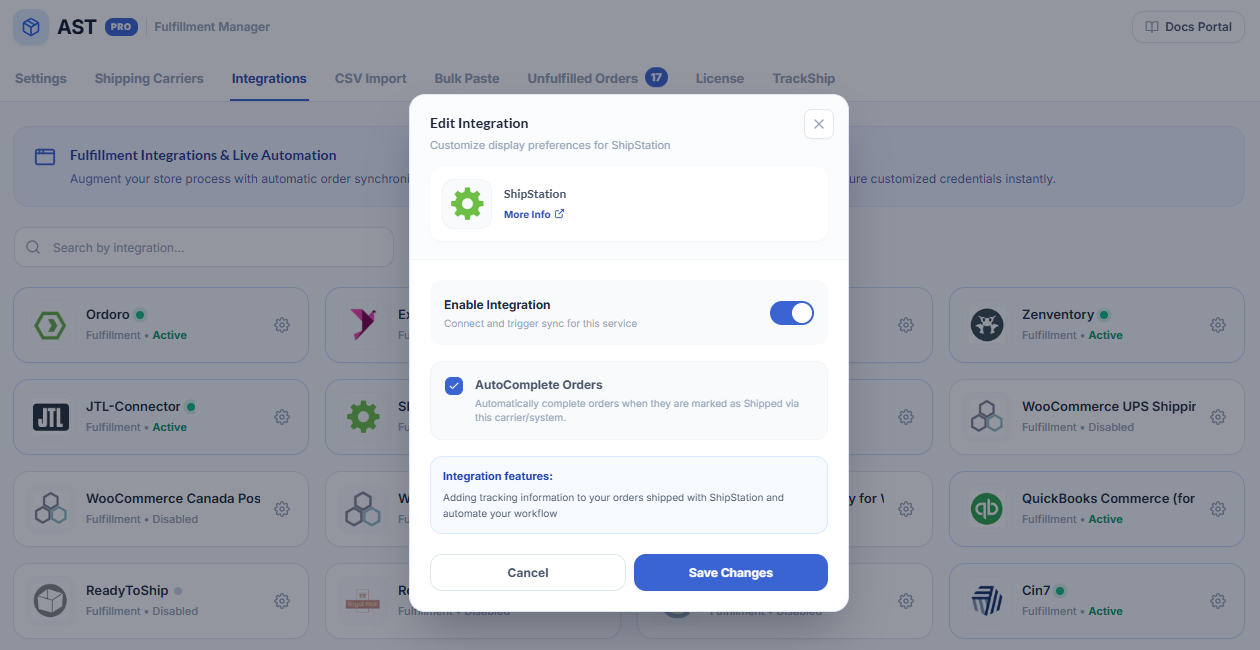
⚙️ How to Enable the Integration
- Go to WooCommerce > Shipment Tracking > Integrations
- Enable the ShipStation integration
- (Optional) Enable Auto-complete shipped orders – AST will automatically set the order status to Shipped once tracking info is added.
🧩 Carrier Name Mapping (Avoid Missing Tracking Links)
ShipStation may send shipping carrier names that differ from AST’s recognized list. If the name isn’t matched, the tracking link will be missing from the shipping confirmation email.
To solve this, AST PRO allows you to map external carrier names to the correct entries in its internal list.
🔧 How to Map Carrier Names:
- Go to WooCommerce > Shipment Tracking > Shipping Carriers
- Click Edit on the relevant carrier
- In the Custom API Name field, enter the exact name used by ShipStation
- Use the ➕ icon to add multiple aliases if needed
- Click Update to save changes
This ensures AST properly matches the carrier and generates the correct tracking link for email notifications and customer order views.
💡 Best Practices
- Sync Regularly: Ensure AST’s shipping carrier list is up-to-date to maintain accurate mappings.
- Monitor Integration: Check that tracking is syncing after any plugin updates.
- Inform Customers: Let your customers know how they’ll receive tracking info.