Automated CSV Import pulls tracking CSV files from your FTP or SFTP server on a schedule and imports them into WooCommerce automatically — no manual upload needed. Use this when your shipping software or 3PL drops CSV files to a server location regularly.
The CSV file format is identical to manual CSV Import — the same columns, the same date format rules, and the same carrier name matching apply. Read that page first if you are new to the CSV format.
How to configure
Go to WooCommerce → Shipment Tracking → CSV Import → FTP/SFTP.
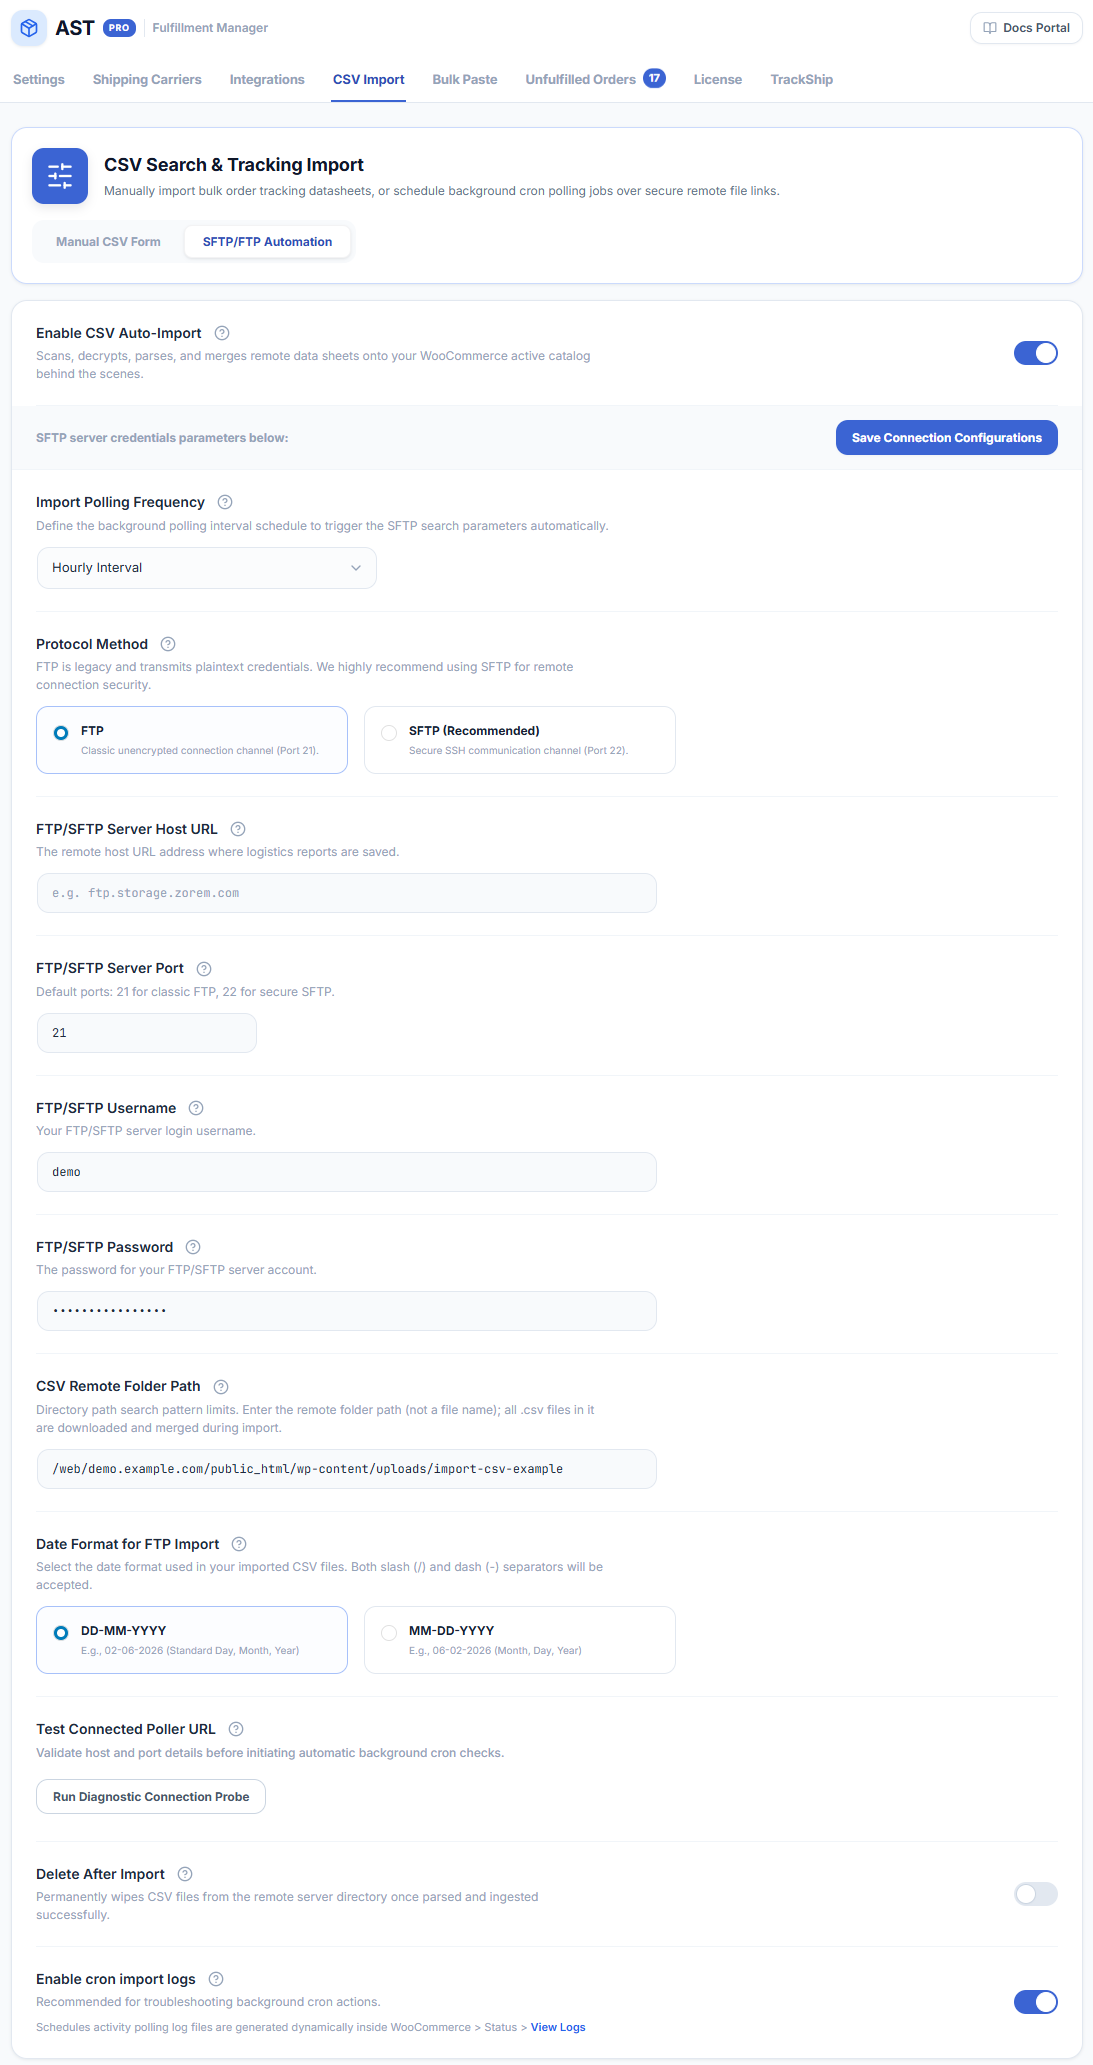
- 1Toggle Enable CSV Auto-import on.
- 2Set Import Frequency — Daily or Weekly.
- 3Set Import Time — the hour of day the import should run. This is your server’s local time. Note: the schedule runs on WP-Cron, which fires when a visitor hits the site. On low-traffic sites imports may run late — use a server-level cron job calling
wp-cron.phpfor reliability. - 4Select FTP or SFTP. Use SFTP wherever possible — FTP sends credentials in plain text. SFTP encrypts the connection.
- 5Enter your Server URL, Username, Password, and Port (FTP default: 21; SFTP default: 22).
- 6Click Test Connection to verify credentials before saving.
- 7Enter the CSV Folder Path — the remote directory path where AST PRO should look for files (e.g.
/exports/tracking/). Enter a directory, not a filename. All.csvfiles in that folder are downloaded and merged on each run. - 8(Optional) Check Delete after import — removes successfully imported files from the server after processing. Without this enabled, the same file is re-imported on every run and tracking entries are duplicated unless Replace tracking information is also on.
- 9(Optional) Check Enable Log — writes import activity to WooCommerce → Status → Logs, source
ast-pro-ftp-import. - 10Click Save Changes.
Security guidance
- Prefer SFTP over FTP — FTP sends your username and password unencrypted. Most modern hosts support SFTP.
- Use a dedicated FTP/SFTP user with access restricted to the CSV folder only — do not use your main server admin account.
- Credentials are stored in the WordPress database. Ensure your WordPress installation has file-level security and database access is restricted.
Troubleshooting
- Connection fails / Test Connection returns an error — double-check server URL (no trailing slash), port, username, and password. Confirm your host allows outbound connections on that port from PHP. If using SFTP, confirm the server supports SFTP (not just FTPS).
- PHP SSH2 extension missing — SFTP requires the
php-ssh2extension. Ask your host to enable it if Test Connection fails specifically for SFTP. - Folder not found / permission denied — the CSV Folder Path must be an absolute path from the FTP home directory (e.g.
/tracking/if the folder is directly in your FTP root). The FTP user must have read access (and delete access if Delete after import is on). - Import not running at the scheduled time — WP-Cron only fires on page visits. Set up a server-level cron job to call
https://your-domain.com/wp-cron.php?doing_wp_cronevery 15 minutes. - Duplicate tracking entries — enable Delete after import so processed files are removed, or enable Replace tracking information in the import settings so re-imports overwrite rather than duplicate.
- Firewall blocking the connection — some hosts block outbound FTP/SFTP from PHP by default. Ask your host to whitelist outbound connections to your FTP server IP on the required port.