AST PRO gives you several ways to add tracking numbers to WooCommerce orders — from manually entering one at a time to bulk-importing thousands via API. Choose the method that fits your fulfillment workflow.
Methods
- Manual entry (this page) — add tracking directly from the Orders list, the Edit Order screen, or the Fulfillment Dashboard
- Bulk Paste — paste CSV-style rows from a spreadsheet without uploading a file
- CSV Import — upload a formatted .csv file to add tracking to multiple orders at once
- Automated CSV Import (FTP/SFTP) — schedule automatic imports from your FTP or SFTP server on a daily or weekly basis
- Shipment Tracking REST API — integrate your shipping software, ERP, or 3PL directly with AST PRO via API
Where to add tracking manually
Go to WooCommerce → Orders and click the tracking icon in the Actions column next to the order.

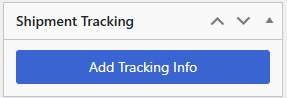
Open any order and find the Shipment Tracking meta box on the right. Click Add Tracking Info.
Go to WooCommerce → Shipment Tracking → Fulfillment Dashboard and click the tracking icon in the Actions column.

Tracking form fields
| Field | Required | Description |
|---|---|---|
| Tracking Number | Yes | The tracking number provided by your carrier. |
| Shipping Provider | Yes | Select from your list of enabled carriers. |
| Date Shipped | Yes | The date the package was handed to the carrier. |
| Custom Tracking Link | No | Override the carrier’s default tracking URL with a custom link for this shipment. |
| Shipping Note | No | A customer-visible note shown alongside the tracking information. |
| Mark Order As | Yes | Shipped — all items fulfilled; Partially Shipped — some items still pending. |
Editing and deleting tracking
To edit or delete an existing tracking entry, open the order and find the tracking entry in the Shipment Tracking meta box. Click the pencil icon to edit or the trash icon to delete. Deleting a tracking entry also cancels the shipment record in PayPal or Stripe if sync is enabled.
Add tracking per order item (partial fulfillment)
Use item-level tracking when an order ships in multiple packages. Enable Tracking Per Item in General Settings first. The form gains a per-item quantity column — set the quantity to 0 for items not in the current shipment.
First shipment
- 1Open the Add Tracking Info form.
- 2Set the quantity to 0 for items shipping later.
- 3The Mark order as field auto-selects Partially Shipped.
- 4Enter tracking number, carrier, and date shipped. Click Fulfill Items.
Second shipment (remaining items)
- 1Reopen the Add Tracking Info panel for the same order.
- 2Enter the quantity for the remaining items.
- 3Enter the second tracking number, carrier, and date shipped.
- 4Set Mark order as: Shipped if all items are now fulfilled. Click Fulfill Items.
Troubleshooting
- Tracking icon missing from the Actions column — if you are using HPOS, make sure your WooCommerce version supports the HPOS order screen. On the legacy orders screen, check Screen Options (top-right) and confirm the Actions column is enabled.
- Carrier missing from the dropdown — only enabled carriers appear. Go to Shipping Carriers → Enable Carriers to add the carrier to your active list.
- Tracking saved but not appearing in the customer email — check that the email type is selected under General Settings → Order Emails Display.