White labelling lets you replace a carrier’s name and logo with your own brand in customer-facing emails, the My Account page, and the tracking widget. This keeps the actual logistics provider discreet and delivers a consistent branded post-purchase experience.
Important limitation: White labelling changes the carrier name and logo only. The tracking link still points to the real carrier’s tracking page — customers who click through will see the carrier’s own website. If keeping the carrier completely hidden is a requirement, you would need to use a self-hosted tracking page.
What white labelling changes
- Carrier name shown in order confirmation and shipping emails
- Carrier logo shown in the tracking widget in emails and My Account
- Carrier name and logo on the TrackShip tracking page (if TrackShip is connected)
- Carrier name in TrackShip shipment status emails
How to white label a carrier
- 1Go to WooCommerce → Shipment Tracking → Shipping Carriers.
- 2Find the carrier you want to customise and click its three-dot menu.
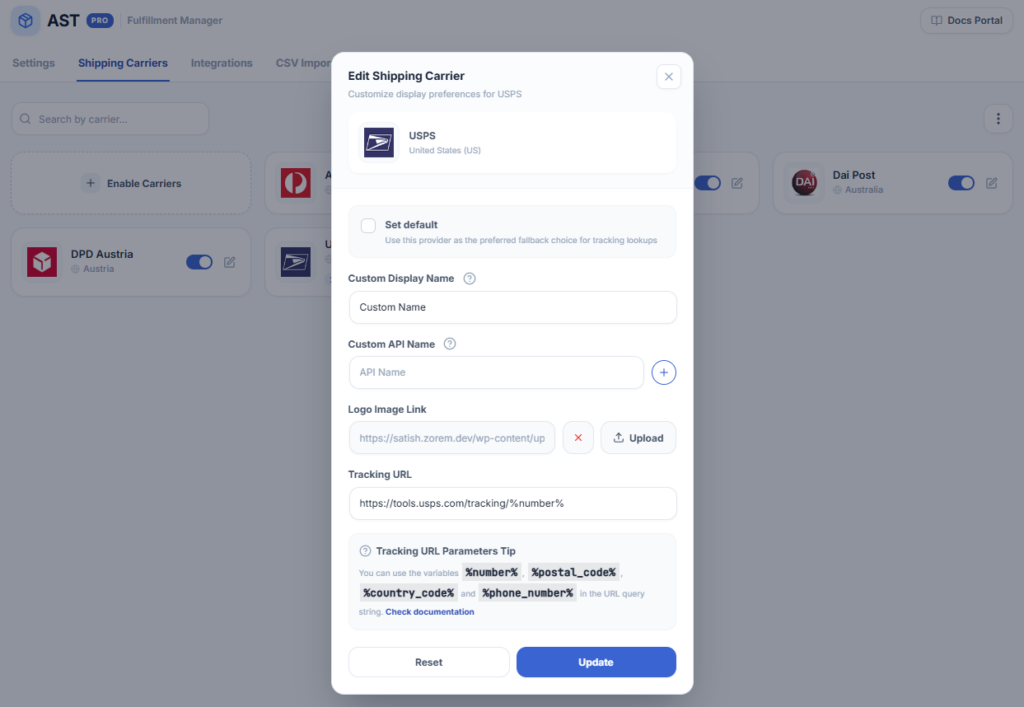
- 3Select Edit. The Edit Shipping Carrier sidebar opens.
- 4In the Custom Display Name field, enter the name you want customers to see (e.g., your store name or a generic label like “Our Delivery Partner”).
- 5In the Logo Image field, upload your own logo — use a 60×60 px PNG or JPG for best results.
- 6Click Update to save.
Reverting to the original carrier details
To remove your customisations and restore the carrier’s original name and logo:
- 1Go to WooCommerce → Shipment Tracking → Shipping Carriers.
- 2Find the carrier and click its three-dot menu → Edit.
- 3In the Edit Shipping Carrier sidebar, click the Reset link at the bottom. This clears the Custom Display Name and Logo Image fields and restores the TrackShip defaults.
- 4Click Update to save.