The carrier list in AST PRO is sourced from TrackShip‘s carrier database. Syncing pulls the latest carrier names, tracking URLs, and logos from TrackShip so your active carriers stay accurate. Run a sync whenever a carrier’s tracking URL stops working or after TrackShip announces new carrier additions.
How to sync shipping carriers
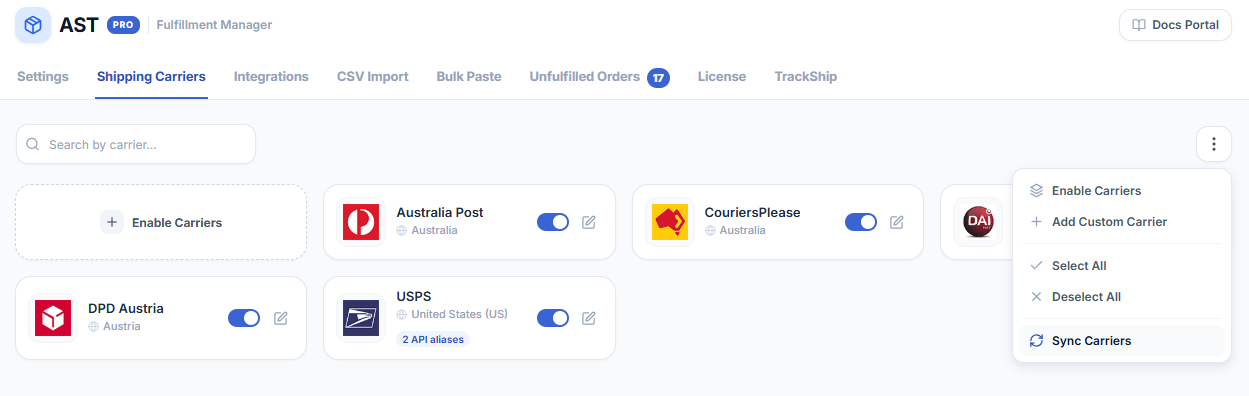
- 1Go to WooCommerce → Shipment Tracking → Shipping Carriers.
- 2Click the three-dot menu in the top-right corner.
- 3Select Sync Carriers from the dropdown. A sidebar titled “Sync Shipping Carriers” opens.
- 4(Optional) Check Reset carriers database if you need a full reset — read the warning below before enabling this.
- 5Click Sync Shipping Carriers. The sync runs and a success message appears when complete. It typically takes a few seconds.
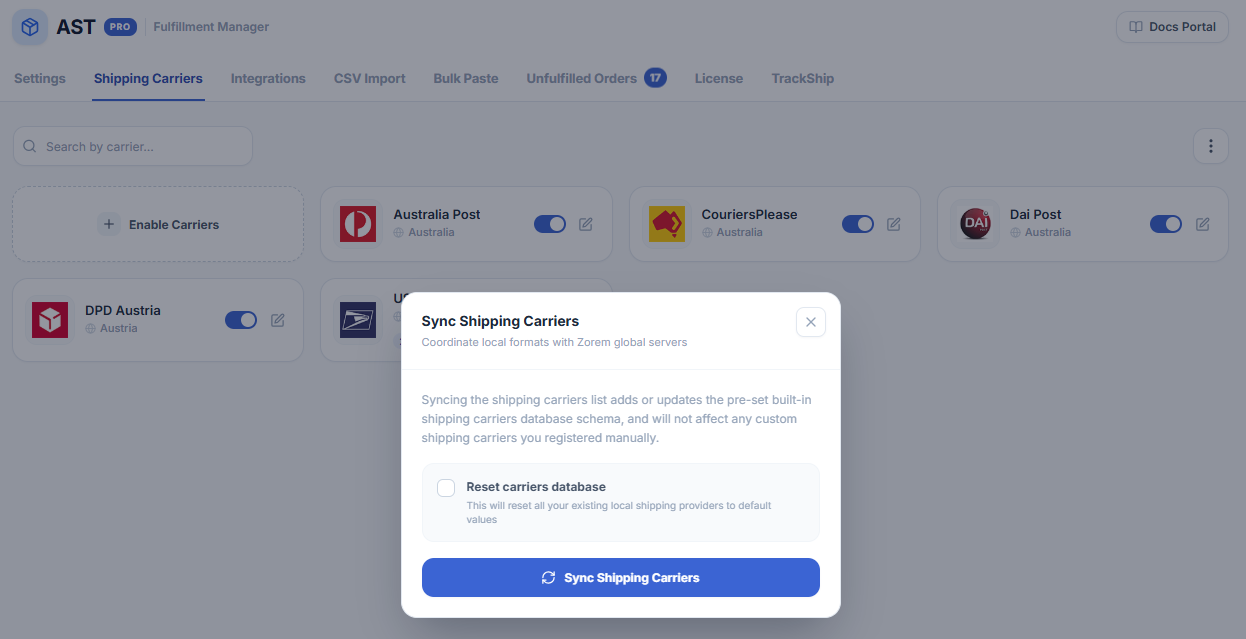

Reset carriers database
The Reset carriers database checkbox changes what the sync does:
| Option | What it does |
|---|---|
| Unchecked (default) | Updates tracking URLs, names, and logos for existing built-in carriers. Your enabled carriers, custom carriers, API aliases, and white-label settings are preserved. |
| Checked | Wipes the entire carrier database and re-imports from TrackShip from scratch. Everything is deleted — enabled carriers, custom carriers, API aliases, and white-label customisations. Use only if the carrier list is corrupted and a normal sync does not fix it. |
Do not use Reset unless absolutely necessary. All custom carriers, API aliases, and white-label settings are permanently deleted and cannot be recovered. Re-enabling built-in carriers is straightforward, but custom carriers and aliases must be recreated manually.
When to sync
- A carrier’s tracking link is broken or redirects incorrectly
- A carrier you expect to find is missing from the list after clicking Enable Carriers
- TrackShip announces support for a new carrier you want to use