Manage customer verification status and perform bulk actions from the WordPress admin.
How to View Customer Verification Status?
- Go to WordPress → Users.
- The Email Verification column shows each user’s status.
- Use the filter dropdown to show only verified or unverified users.
How to Manually Verify a Customer?
- Go to WordPress → Users.
- Find the customer you want to verify.
- Click the Verify action link, OR edit the user profile.
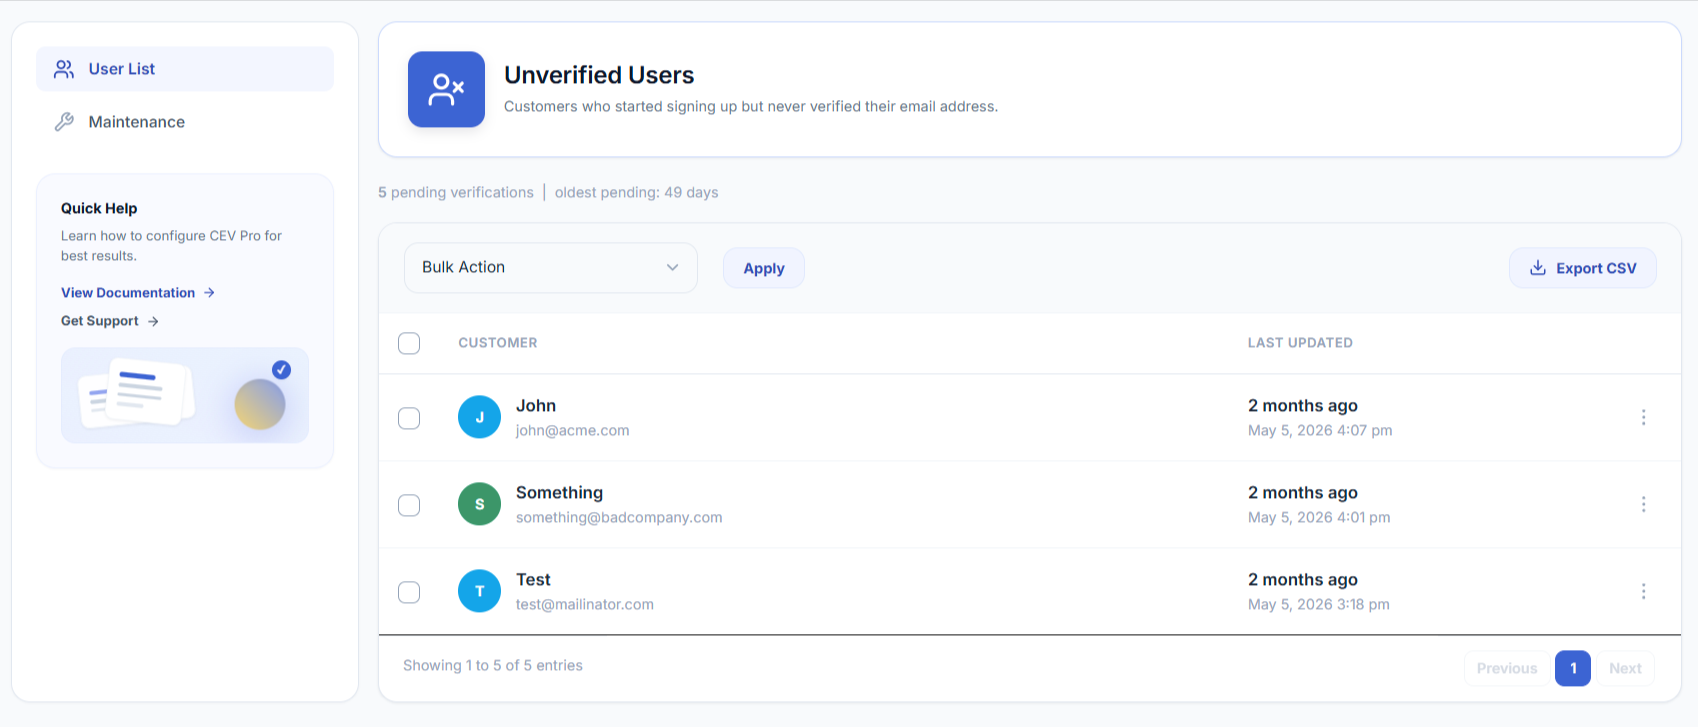
The Unverified Users tab lists every email that started verification but didn’t finish — both registered customers and guest checkout entries. From here you can resend reminders, export data, or remove rows in bulk.
You’ll find it at Settings → Unverified Users → User List.
How to View Unverified Users?
- Go to Settings → Unverified Users → User List.
- The table shows pending verifications with the customer’s name, email, and the date they last attempted verification.
- The header strip displays pending count + oldest pending age at a glance.
How to Send a Reminder Email to a Specific User?
- Go to Settings → Unverified Users → User List.
- Find the row for the customer.
- Click the kebab menu (⋮) at the right of the row.
- Click Send reminder. The customizer-defined re-engagement email is sent to that customer immediately.
Note
Sending a reminder this way is independent of the cron — you can send to any row, anytime, regardless of the configured intervals.
How to Send Reminders to Multiple Users at Once?
- Go to Settings → Unverified Users → User List.
- Tick the checkboxes next to the users you want to email.
- From the Bulk Action dropdown, choose Send re-engagement reminder.
- Click Apply.
- Confirm the send in the modal that appears.
Tick the checkbox in the column header to select every visible row at once.
How to Delete an Unverified User Entry?
- Go to Settings → Unverified Users → User List.
- Click the kebab menu (⋮) on the row.
- Click Delete and confirm.
For bulk delete: tick multiple rows, choose Delete from the Bulk Action dropdown, click Apply, and confirm.
How to Export the Unverified User List to CSV?
- Go to Settings → Unverified Users → User List.
- Click Export CSV in the top-right of the records card.
- The file downloads with columns: ID, Email, Status, Last Updated.
The export includes the entire list, not just the visible page.