AST’s carrier list comes from TrackShip’s carrier database, and we keep it up to date as carriers change their tracking URLs and as new ones are added. Sync Shipping Carriers pulls the latest version of that list into your store, so your tracking links, carrier names and logos stay correct.
Sync whenever a tracking link stops working, or when the carrier you’re looking for isn’t in the list yet.
How to sync the shipping carriers
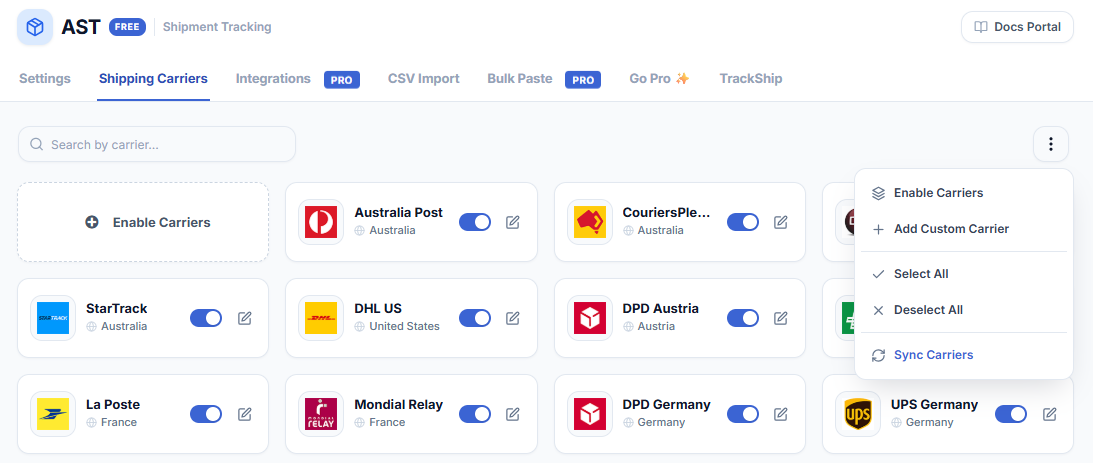
- Go to WooCommerce > Shipment Tracking > Shipping Carriers.
- Click the three-dot menu in the top right corner.
- Select Sync Carriers.
- A Sync Shipping Carriers panel opens from the side.
- Click Sync Shipping Carriers to update your list.
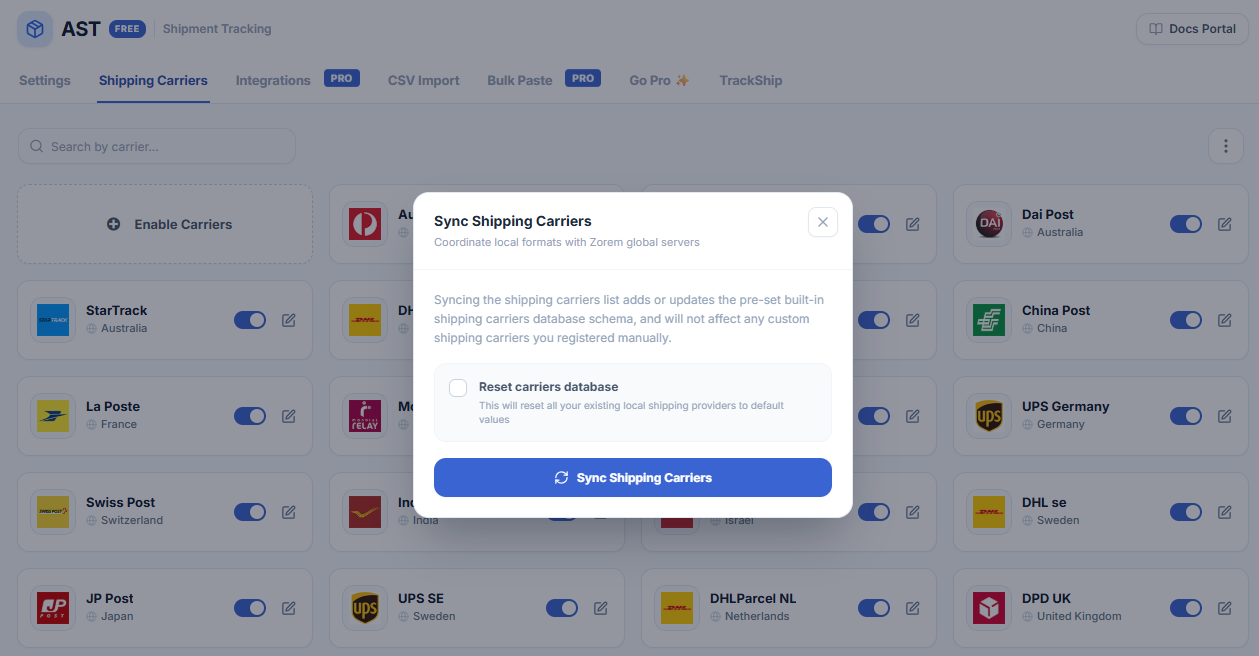
The “Reset carriers database” option
Before you click sync, you can tick Reset carriers database. Most of the time you shouldn’t.

| Option | Description |
|---|---|
| Unchecked (default) | Updates the built-in carrier list — tracking URLs, names and logos — and adds any new carriers. The carriers you enabled stay enabled. This is the option you want almost every time. |
| Checked | Wipes the carrier database and rebuilds it from scratch. Every carrier you enabled is un-enabled, so you have to enable your carriers again afterwards. Only use this if your carrier list is genuinely broken and a normal sync hasn’t fixed it. |
Notes
- A normal sync never removes carriers you enabled — only the reset option does.
- Syncing doesn’t touch the tracking numbers already saved on your orders.
- If you do reset, you can enable your carriers again straight away — see Enable Shipping Carriers.
Next: Removing Shipping Carriers.