All of AST’s settings live in one place. In your WordPress admin, go to WooCommerce > Shipment Tracking, then open the Settings tab. The sidebar on the left moves between the settings panels.
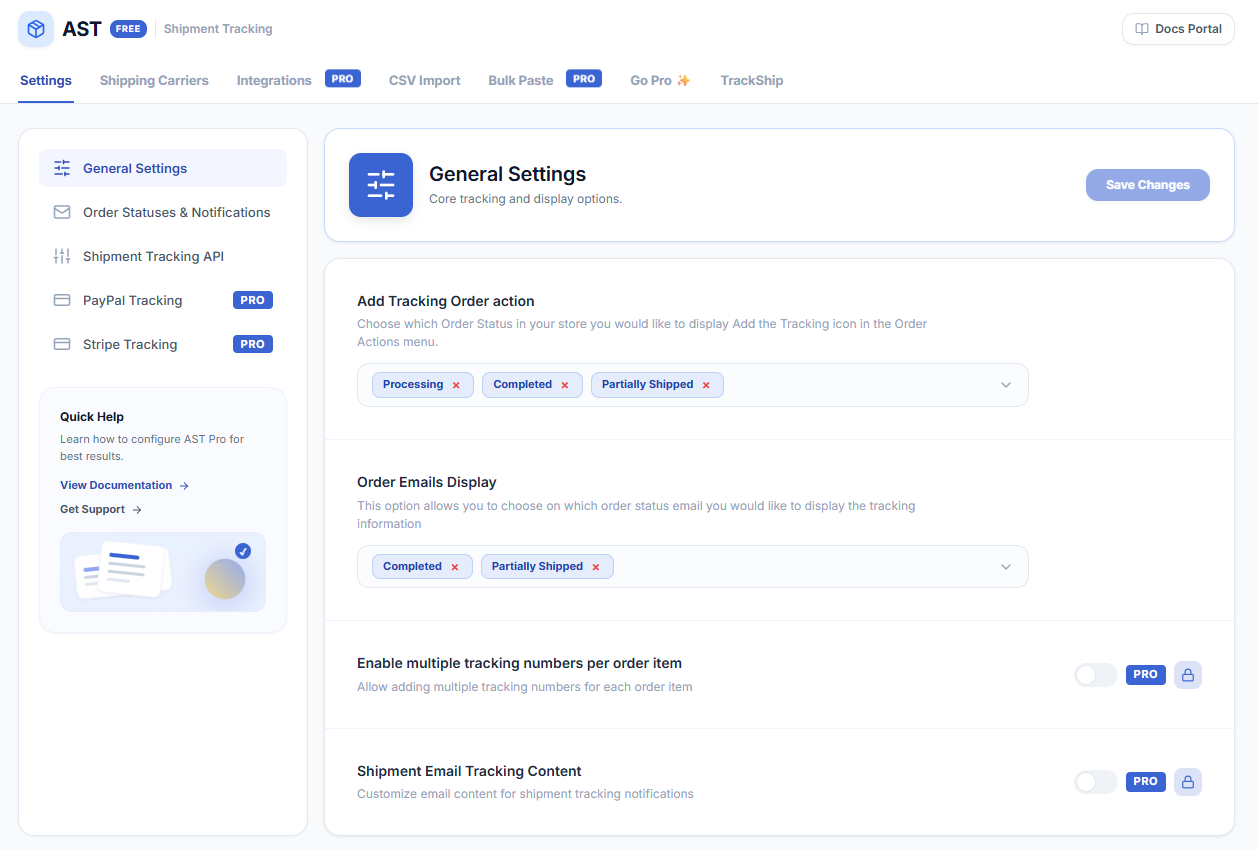
The settings panels
| Panel | What it's for |
|---|---|
| General | How tracking is added to orders and where the tracking info appears — the options you’ll touch most often. |
| Order Statuses & Notifications | Turn on the Partially Shipped and Delivered statuses, style them, and choose which ones email the customer. |
| Shipment Tracking API | The date format the REST API expects, and the API request log. Only needed if something adds tracking through the API. |
| PayPal, Stripe and FTP Import | Shown in the sidebar with a PRO badge. Tracking sync to PayPal and Stripe, and scheduled FTP/SFTP imports, are part of AST PRO. |
The email and tracking widget design isn’t a settings panel — it has its own customizer, which you open from the gear icon on a status row. See Customize Email Notifications & Tracking Widget.
Recommended setup order
If you’ve just installed AST, work through it in this order. Each step builds on the one before it.
- Enable your shipping carriers. Do this first — until a carrier is enabled, you can’t pick it when you add tracking.
- General settings. Decide how tracking gets added and where it shows up.
- Order Statuses & Notifications. Turn on the statuses you need and choose which ones email the customer.
- Customize the emails and tracking widget so they match your brand.
- Send yourself a test order and check the email and the My Account page before you go live.
- Only if you’re integrating another system: set up the Shipment Tracking API or CSV import.
Next: General Settings.