Install AI Shopping Assistant, check that your site meets the requirements, activate your license, and put the chat on your shop.
Requirements
- WordPress 6.9 or later and PHP 8.0 or later. Tested up to WordPress 7.1.
- An active AI Shopping Assistant license from zorem.com. Without one, the plugin stays locked.
- WooCommerce — the chat appears on your shop and works with your catalogue, basket and orders.
- An AI provider (optional) — for written answers, a provider such as Google (Gemini), OpenAI or Anthropic. Each one is added through its own WordPress AI provider plugin, plus a key. Without a provider, the chat still answers by quoting your shop’s own information.
- An administrator account — to activate the license, switch the chat on and change site-wide settings.
How to Install the Plugin
WordPress Admin → Plugins → Add New → Upload Plugin- Go to Plugins → Add New and click Upload Plugin.
- Click Choose File and select the
ai-shopping-assistant.zip file. - Click Install Now, then Activate Plugin.
Activate Your License
AI Shopping Assistant → LicenseRight after activation, AI Shopping Assistant is locked: the License tab is the only screen, and the shopping assistant, the store assistant and the Website Brain stay off until a license is active. Nothing appears on your shop until then.
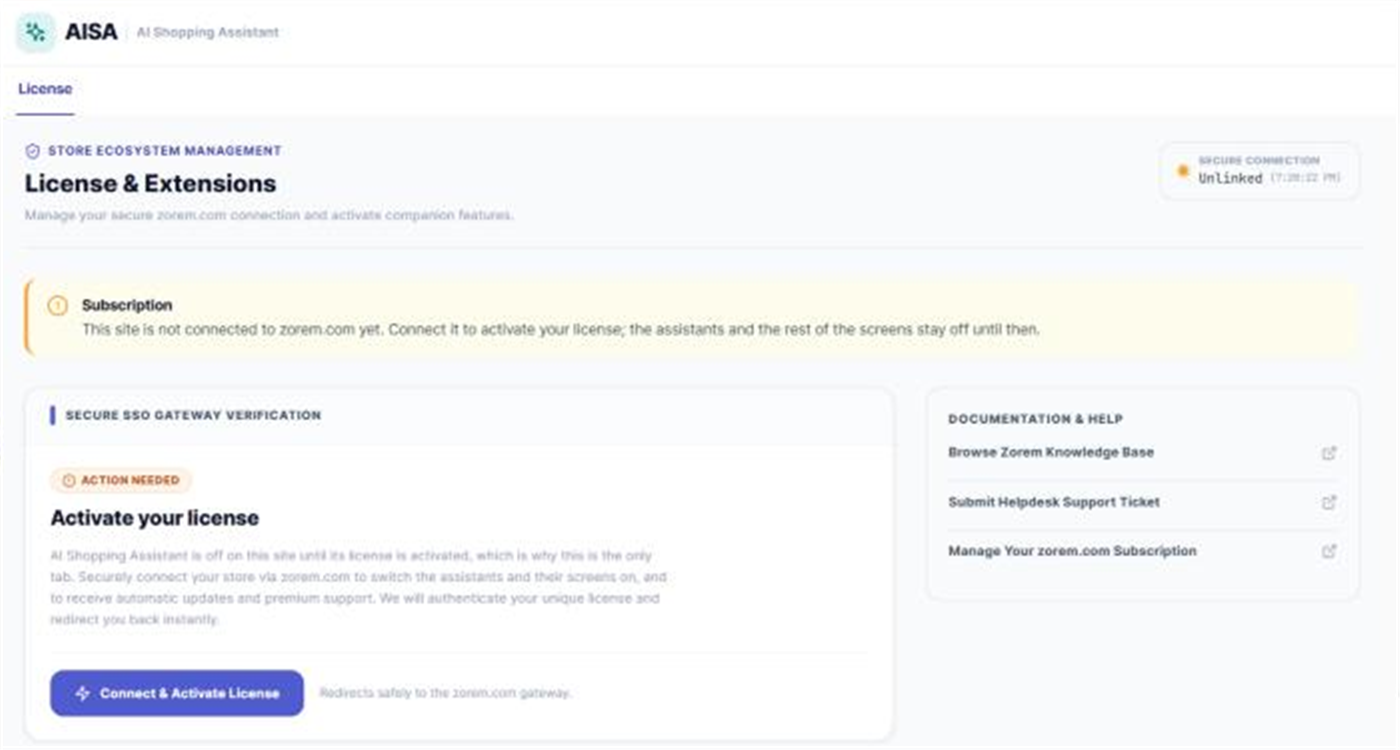
- Go to AI Shopping Assistant → License and click Connect & Activate License.
- Sign in on zorem.com with the account you bought AI Shopping Assistant with.
- You come back to the License tab with the message License activated, and all the other tabs appear.
To move the license to another site, click Deactivate License on the License tab first. This locks AI Shopping Assistant on this site until a license is active again, and the chat disappears from your shop. Your settings, saved conversations and activity history are kept and come back with the license.
Switch the Chat On
AI Shopping Assistant → Shopping assistant → Availability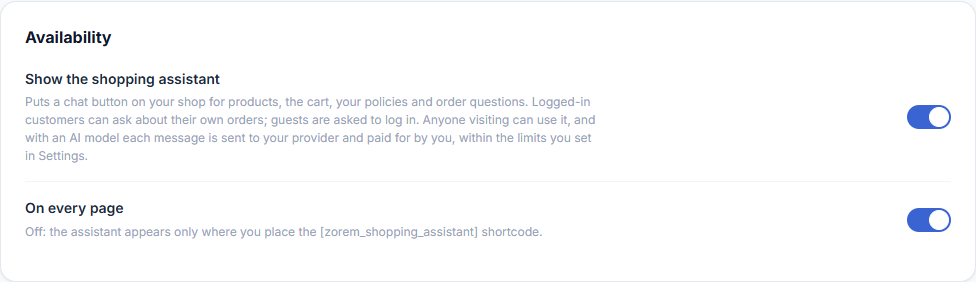
- Turn on Show the shopping assistant. A chat button appears on your shop.
- Leave On every page on to show it across the shop, or turn it off and place the
[zorem_shopping_assistant]shortcode only where you want it. - Check the banner at the top. It says whether the chat is answering with your AI model or by quoting your shop’s information.
Connect an AI Provider (Optional)
AI Shopping Assistant → Settings → AI provider
- Install the provider plugin for the service you want to use. WordPress’s AI client ships with no providers of its own — Anthropic, OpenAI and Google each come from their own plugin.
- Tick the acknowledgement that messages and the shop information read to answer them are sent to your provider.
- Choose the provider and paste its API key, then click Save key.
- Pick a model, or leave it on the provider’s default.
A key you already set in wp-config.php, in your server’s environment, or in WordPress’s Connectors screen is used without storing it again.
Next Steps
- Shopping Assistant — words, starter questions, corner and pages.
- Website Brain — choose the pages the chat answers from.
- Settings — limits, knowledge and contact options.