Install AI Agent OS PRO, check that your site meets the requirements, activate your license, and connect your first AI app to the agent the plugin creates for you.
Requirements
- WordPress 6.9 or later and PHP 8.0 or later.
- An active AI Agent OS license from zorem.com. Without one, the plugin stays locked.
- WooCommerce — only for the store tools (orders, products, customers). The WordPress tools and the Website Brain work on any WordPress site. Works with either order storage, including High-Performance Order Storage (HPOS).
- HTTPS and pretty permalinks — needed to connect Claude or ChatGPT by signing in. Without them, you can still connect with an agent token.
- An administrator account — to activate the license, create agents, approve connections and change site-wide settings.
How to Install the Plugin
WordPress Admin → Plugins → Add New → Upload Plugin- Go to Plugins → Add New in your WordPress admin and click Upload Plugin.
- Click Choose File and select the
ai-agent-os-pro.zip file. - Click Install Now, then Activate Plugin.
ai-agent-os-pro. If WordPress deactivated it after the update, activate AI Agent OS PRO again on the Plugins screen. Agents, MCP addresses, settings and the license are kept.Activate Your License
AI Agent OS → LicenseRight after activation, AI Agent OS PRO is locked: the License tab is the only screen, and agents, MCP connections, tools and the Website Brain stay off until a license is active.
- Go to AI Agent OS → License and click Connect & Activate License.
- Sign in on zorem.com with the account you bought AI Agent OS PRO with.
- You come back to the License tab with the message License activated, and all the other tabs appear.
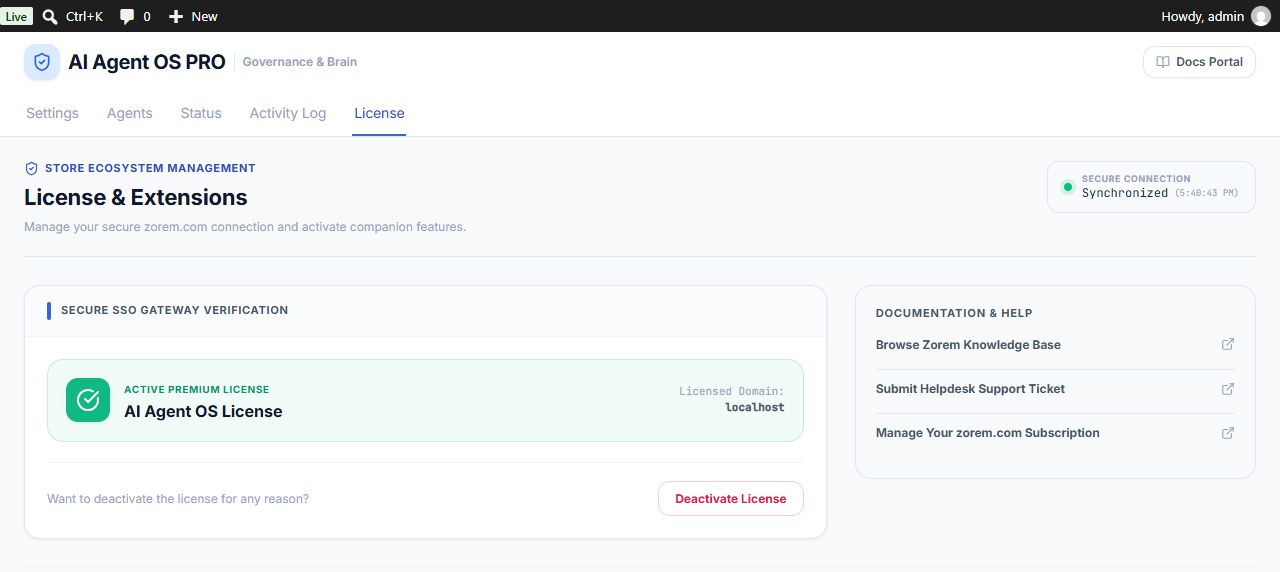
To move the license to another site, click Deactivate License on the License tab first. This locks AI Agent OS PRO on this site until a license is active again.
With the license active, the AI Agent OS menu opens on Settings and shows the tabs Settings, Agents, Status, Activity Log and License, plus the Website Brain screen.
What You See the First Time
On first activation the plugin creates an agent called Admin Assistant. It acts for the store administrator and has every tool allowed (Read or Write); destructive tools stay off. It has no token until you issue one — Claude and ChatGPT connect by signing in and don’t need one.
Quick Start: Connect Your First AI App
AI Agent OS → Agents → Admin Assistant → Connection- Go to AI Agent OS → Agents and click Admin Assistant.
- Open Connection and click Copy next to This agent’s address.
- Add the address to your AI app as a custom connector — the Connection section shows the steps for Claude, ChatGPT and Codex.
- Approve the sign-in on your site as an administrator. Check that the screen names your agent, then click Approve and connect.
- Ask in plain words — for example Draft a post about our summer sale or Reply to the newest comment.
Want an agent for a narrower job? Click Add agent on the Agents tab and start from a ready-made profile such as Support Agent or Fulfillment Agent.
Next Steps
- Agents — create, revoke and delete agents.
- Permissions — choose exactly which tools each agent may use.
- Connecting Claude, ChatGPT and Codex — the full steps for each app.