Every agent has its own private MCP address. You add that address to your AI app, approve the connection on your site, and the app then works as that agent — with only that agent’s tools, and every call recorded in the Activity Log under its name.
AI Agent OS → Agents → Configure → ConnectionBefore You Start
- Your site uses HTTPS and its permalinks are not set to Plain (Settings → Permalinks). Signing in needs both.
- The agent is active and has the permissions you want.
- You can log in as an administrator to approve the connection.
If signing in is not possible on your site, the Connection section shows a yellow notice with the reason. You can still connect with the agent’s token (see below).
Step 1: Copy the Agent’s Address
On the agent’s Connection section, click Copy next to this agent’s address. It looks like https://yourstore.com/wp-json/ai-agent-os/v1/mcp/agent/….
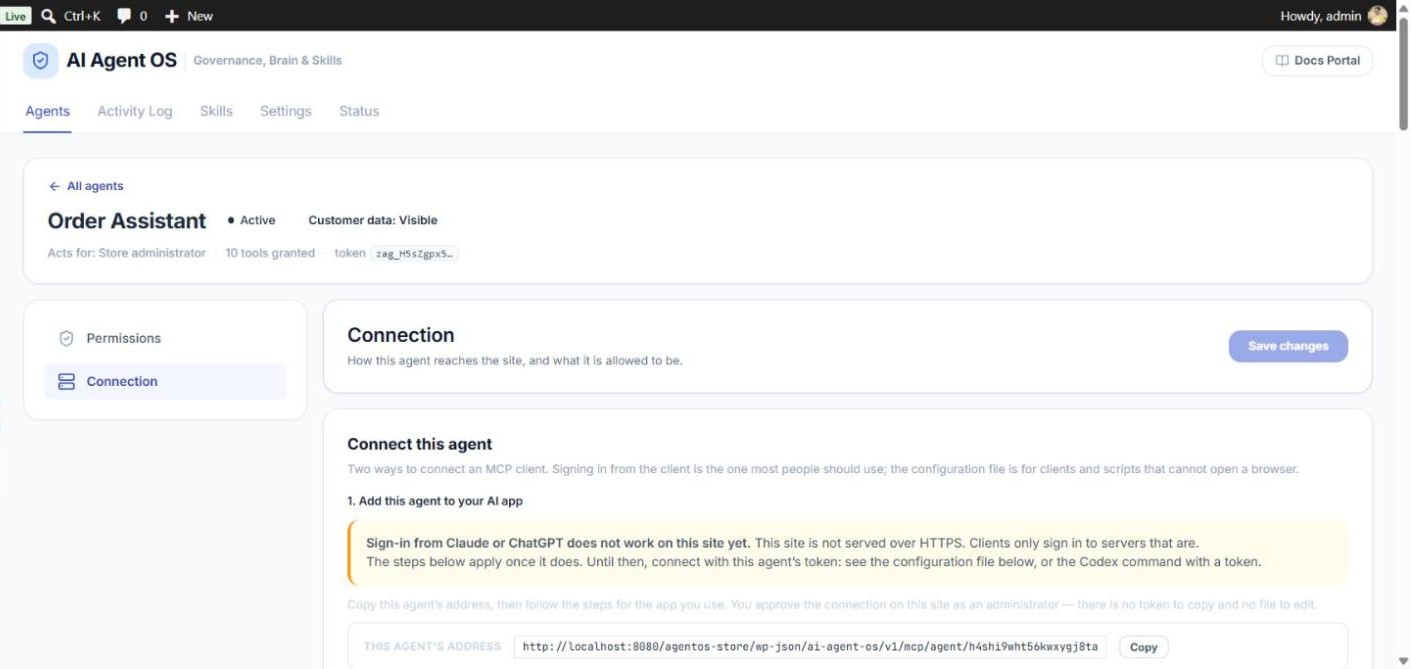
The screen above is from a test site without HTTPS, so it shows the yellow notice. The steps for each app are listed right below the address:
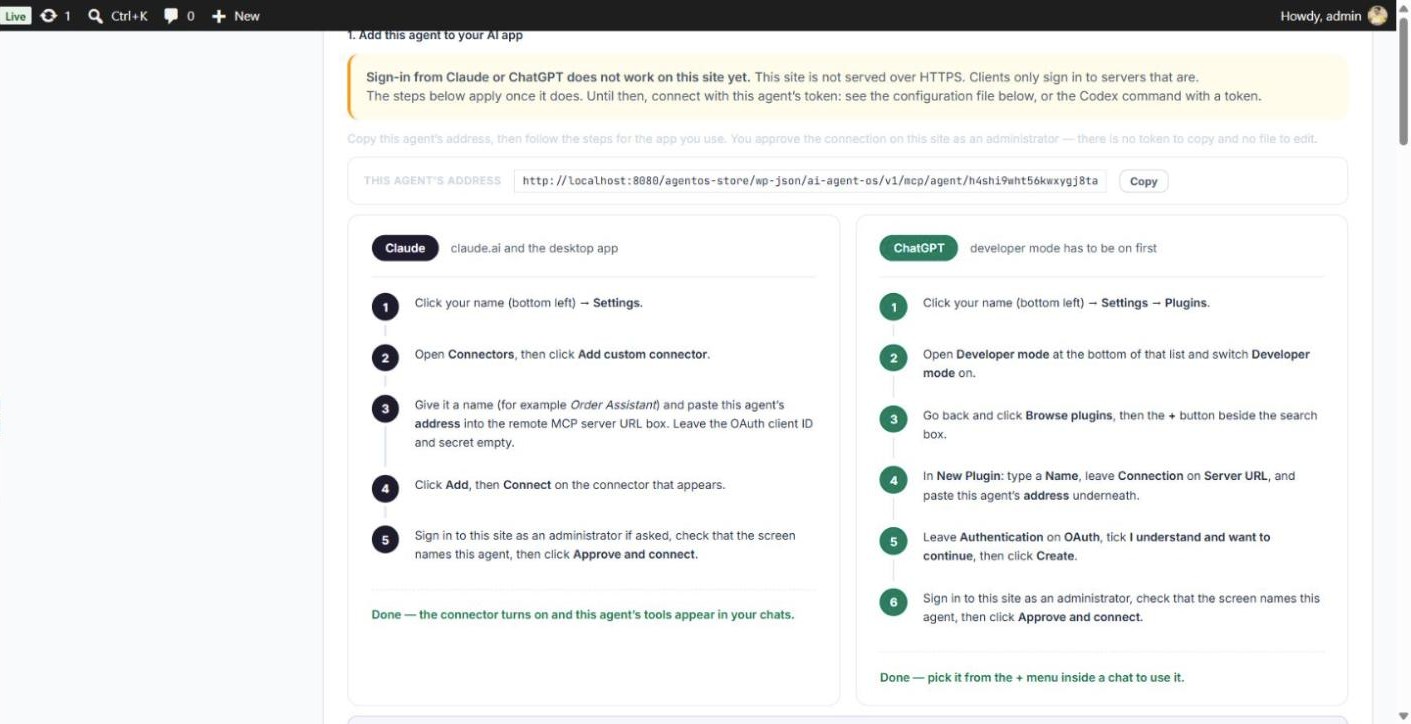
Connect Claude
- In Claude (claude.ai or the desktop app), click your name → Settings.
- Open Connectors and click Add custom connector.
- Enter a name (for example the agent’s name) and paste the agent’s address. Leave the OAuth client ID and secret empty.
- Click Add, then Connect.
- Sign in to your site as an administrator, check that the screen names this agent, and click Approve and connect.
Connect ChatGPT
- In ChatGPT, click your name → Settings → Plugins, open Developer mode and switch it on.
- Go back, click Browse plugins, then the + button.
- Enter a name, leave Connection on Server URL, and paste the agent’s address.
- Leave Authentication on OAuth, tick I understand and want to continue, and click Create.
- Sign in to your site as an administrator and click Approve and connect. Then pick it from the + menu inside a chat.
Connect Codex
The Connection section shows ready-made commands with the agent’s address filled in. Run them in a terminal:
codex mcp add order-assistant --url https://yourstore.com/wp-json/ai-agent-os/v1/mcp/agent/…
codex mcp login order-assistantOther apps that support remote MCP — such as Cursor, VS Code and Claude Code — work the same way: add a remote MCP server and paste the agent’s address.
The Approval Screen
When an app signs in, your site shows a page titled A client is asking to connect to this site. Check it before approving:
- Who is asking — the large text is the address the connection is handed to (for example claude.ai). This is the one fact an app cannot fake; the app’s own name is shown smaller and is not checked.
- Which agent — the agent it connects as, with its tools and what it cannot do (for example “Cannot see customer names… they are replaced with [masked]”).
- What approving does — the app acts as that agent. Nothing new is created and no permission changes.
If you did not just start a connection from that app, click Deny. Nothing is changed.
Connect Several Agents
Because every agent has its own address, you can add several agents to the same Claude or ChatGPT account — for example Order Assistant and Support Assistant as two separate connectors, each with its own tools. Revoking one disconnects only that one.
Connect with a Token Instead
Some apps (and sites without HTTPS) use a configuration file instead of signing in. Click Copy configuration in step 2 of the Connection section, paste it into the app’s MCP configuration, and replace PASTE_YOUR_TOKEN_HERE with the agent’s token (it starts with zag_). For Codex, the Connection section also shows a command that reads the token from an environment variable.

How Long a Connection Lasts
A signed-in app refreshes its access quietly every hour. After 90 days it must be approved again — open the connector in the app and click Connect. A connection also ends when you:
- Revoke or delete the agent, or its expiry date passes.
- Click New address on the agent’s Connection section (the old address stops working and every sign-in ends).
- Leave the app unused for 30 days.