Requirements
- WordPress installed and running
- WooCommerce installed and active
- WooCommerce geolocation set up with a free MaxMind license key — geolocation is not enabled by default. See Set Up Geolocation below.
How to Install the Plugin
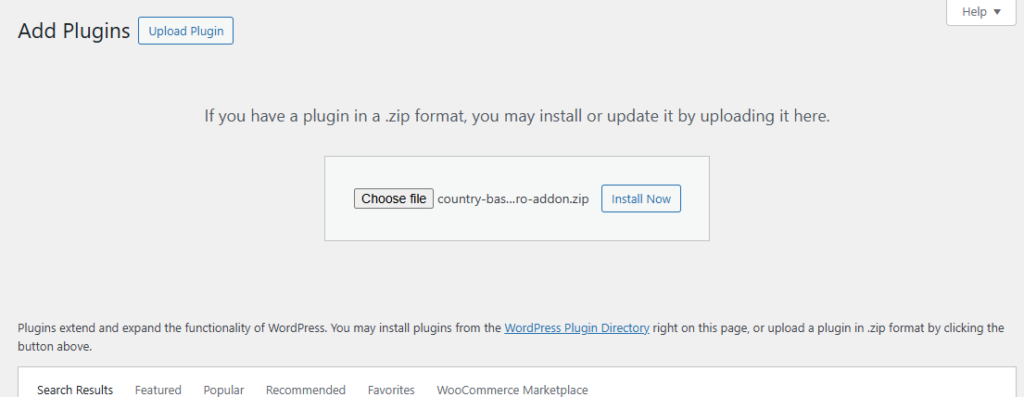
WordPress Admin → Plugins → Add New → Upload Plugin- Download the plugin .zip file — from the Subscriptions tab in your account at zorem.com/my-account/subscriptions/.
- In your WordPress admin — go to Plugins → Add New.
- Click Upload Plugin — at the top of the page.
- Click Choose File — and select the downloaded .zip file.
- Click Install Now — then click Activate Plugin.
- After activation — navigate to WooCommerce → Country Restrictions to access all settings.
INFO
When the PRO plugin is activated, it automatically deactivates the free version and preserves all your existing settings and restriction rules. You can safely delete the free version after this.
How to Activate the PRO License
WooCommerce → Country Restrictions → License- In your WordPress dashboard — go to WooCommerce → Country Restrictions → License.
- Click Activate License. — This redirects you to zorem.com to connect your store.
- On zorem.com — confirm the activation for your store’s URL.
- You will be redirected back to your store — and the license will be shown as active on the License tab.


Set Up Geolocation (Required for IP Detection)
IMPORTANT
WooCommerce geolocation is not enabled by default. Since WooCommerce 3.9, IP-based country detection requires a free MaxMind license key. Without it, the country of guest visitors cannot be detected from their IP address, and restrictions will not apply until the customer enters an address or selects a country.
WooCommerce → Settings → Integration → MaxMind Geolocation- Create a free MaxMind account — at maxmind.com (sign up for GeoLite2).
- Generate a license key — in your MaxMind account, go to Manage License Keys and create a new key.
- Paste the key — into WooCommerce → Settings → Integration → MaxMind Geolocation, then click Save changes. WooCommerce downloads the geolocation database automatically.
- Enable geolocation — in WooCommerce → Settings → General, set Default customer location to Geolocate. If your site uses a full-page caching plugin, choose Geolocate (with page caching support) instead.
INFO
How Country Based Restrictions PRO detects the customer’s country, in order of precedence: 1) the country the visitor selected in the Country Detection widget or shortcode (stored in a cookie named country for 30 days), 2) the address of the logged-in customer or the address entered at checkout, 3) IP geolocation via MaxMind. Whether the billing or shipping country is used depends on the Restriction by country setting in Setup & Configuration.
Next Steps
Now that the plugin is installed and geolocation is working, configure your restrictions:
- Setup & Configuration — choose the restriction mode, visibility of restricted products, and messages.
- How to Set Product Restrictions — restrict individual products by country.
- How to Use the Country Detection Widget — let visitors select their country in your store.