The Map-Based Location Picker lets customers choose their pickup store from an interactive map instead of only a dropdown. This is especially helpful for stores with several pickup locations, as customers can see exactly where each store is. An optional “Use my location” button detects the customer’s position and sorts the locations by nearest distance.
The map uses OpenStreetMap, so you do not need a Google Maps API key for it to work.
How to set it up
Setting up the map picker takes two short steps — turn it on, then add coordinates to each location so they can appear on the map.
Step 1 — Turn on the map picker
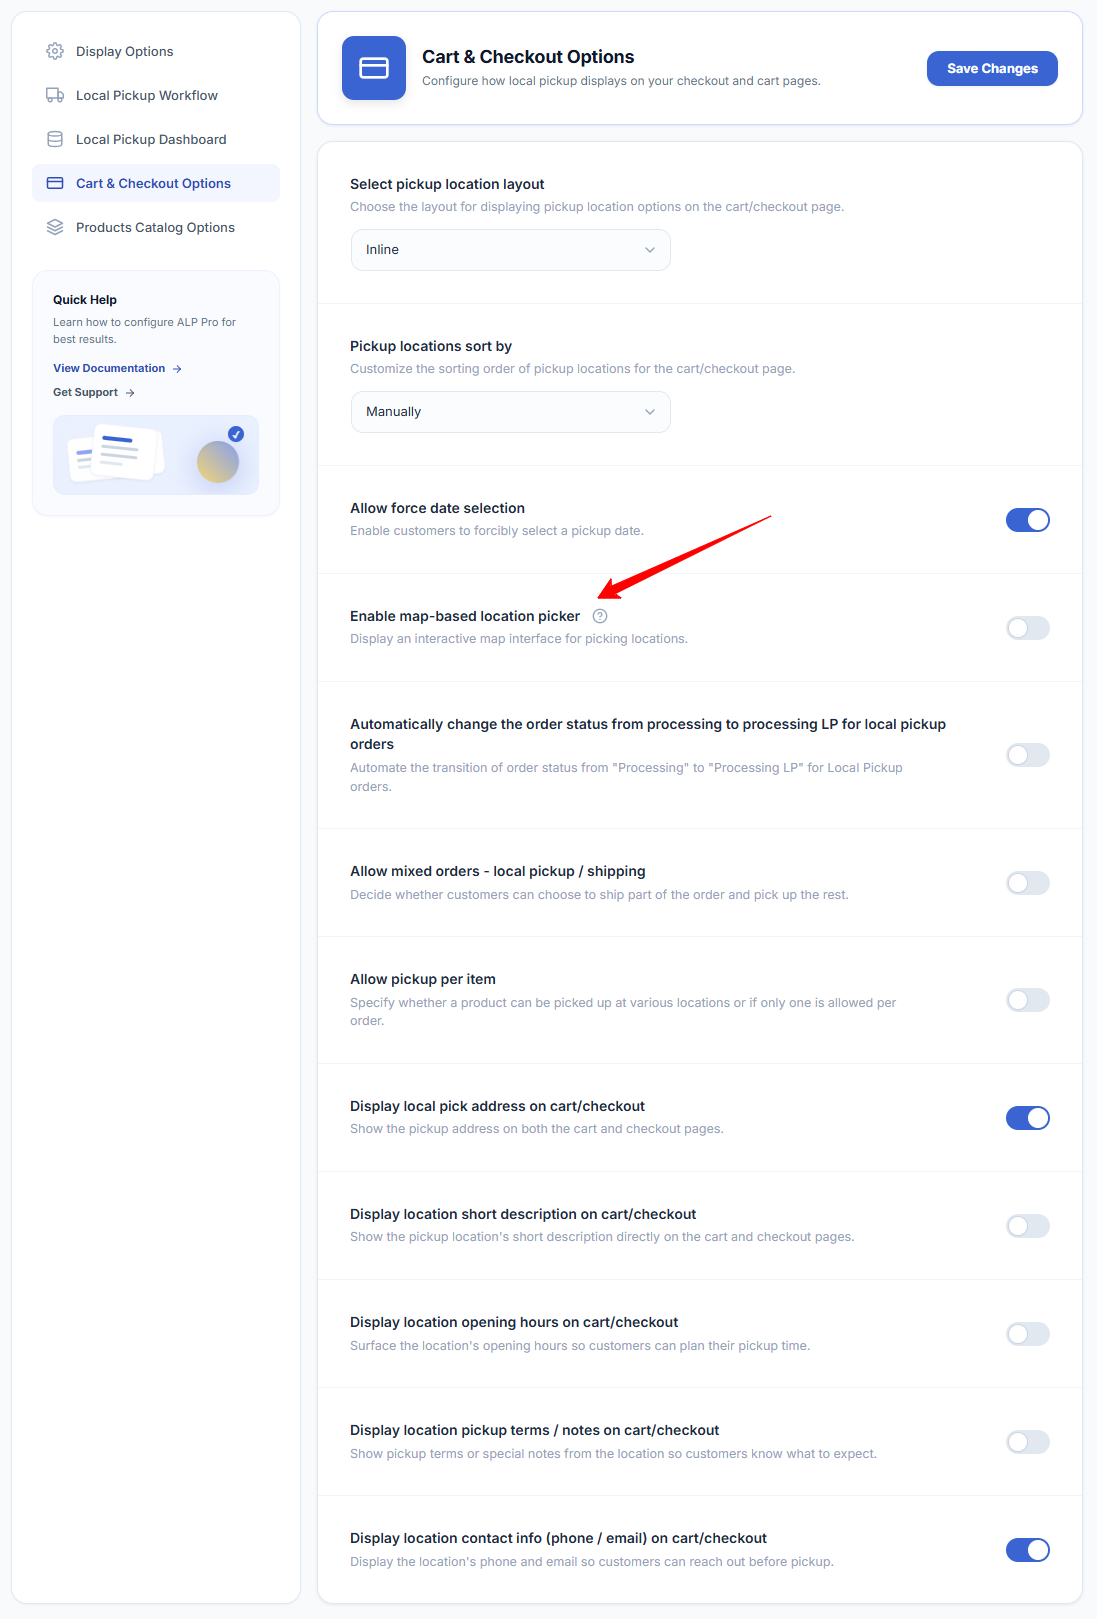
Where: Go to Local Pickup Pro → Cart & Checkout Options.
- Tick the Enable map-based location picker option.
- Click Save & close.
Step 2 — Add coordinates to each location
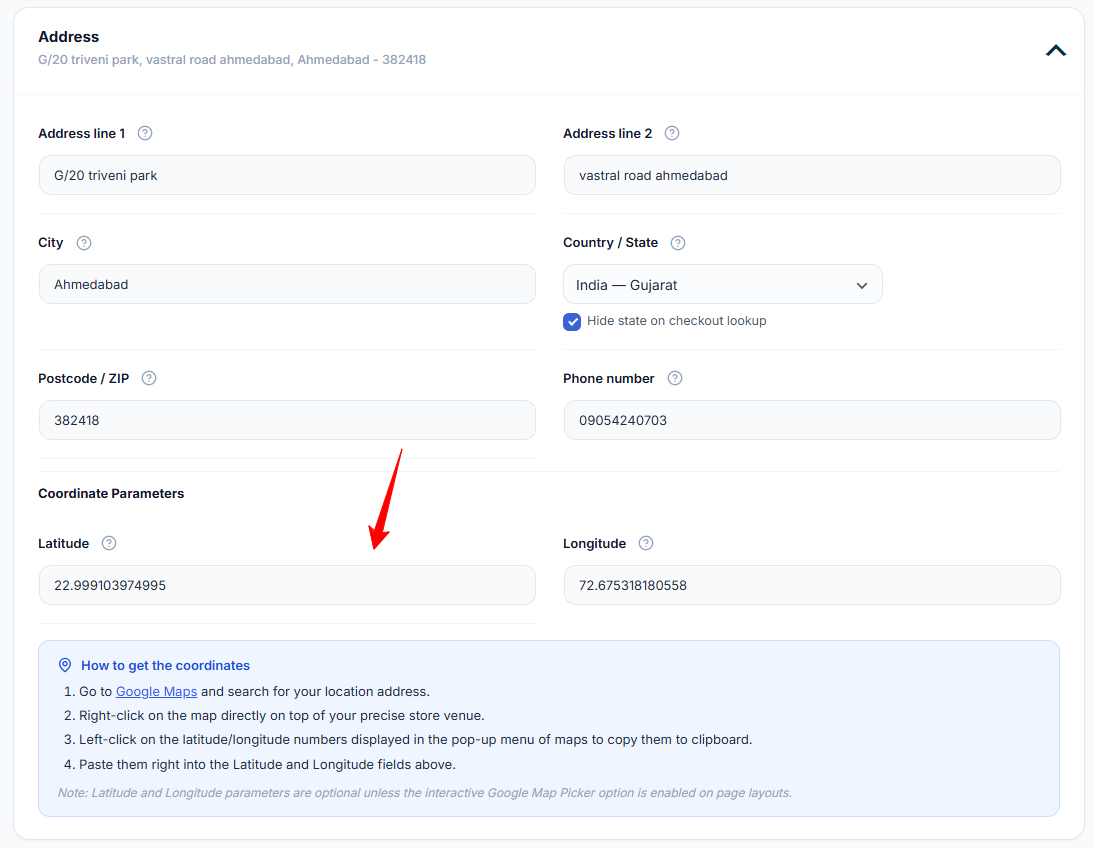
The map can only show locations that have coordinates. For each pickup location, add its Latitude and Longitude in the Address section.
Where: Go to Pickup Locations, edit a location, and scroll to the Latitude / Longitude fields.
- Open Google Maps and search for your store location.
- Right-click directly on your store’s pin on the map.
- Click the numbers shown at the top of the menu to copy them.
- The first number is the Latitude and the second is the Longitude — paste each into the matching field and Save.
What the customer sees
At checkout, all your pickup locations appear as pins on the map. The customer clicks a pin to select that store, or taps “Use my location” to have the list sorted by the nearest store first. The dropdown below the map stays in sync with the selection.

Good to know: The map only loads on the cart and checkout pages, and only when the picker is turned on, so the rest of your store is unaffected. On smaller screens the picker stays easy to use.