Curbside Pickup Mode lets customers stay in their vehicle and let your team know when they have arrived. You can turn curbside on for any pickup location. When a customer chooses a curbside-enabled location, they can add their vehicle details at checkout. Once their order is Ready for Pickup, an “I’ve arrived” button appears on their order page — and tapping it sends your store an instant email.
Step 1 — Enable curbside for a location
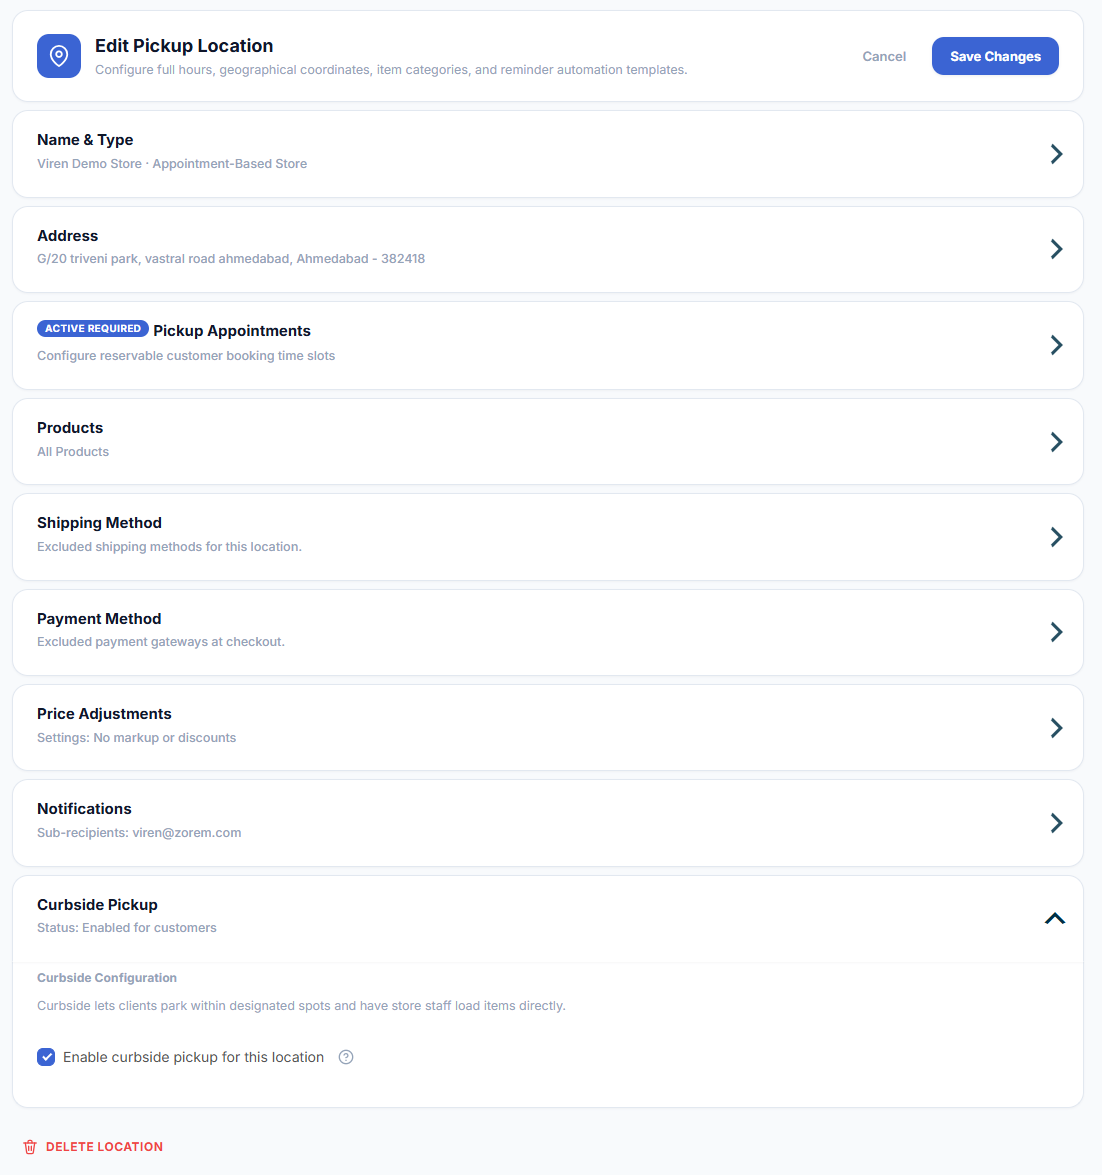
Where: Go to Pickup Locations, edit a location, and open the Curbside Pickup section.
- Tick Enable curbside pickup for this location.
- Click Save & close.
Customers who choose this location at checkout will then see the curbside fields. You can enable curbside on as many locations as you like.
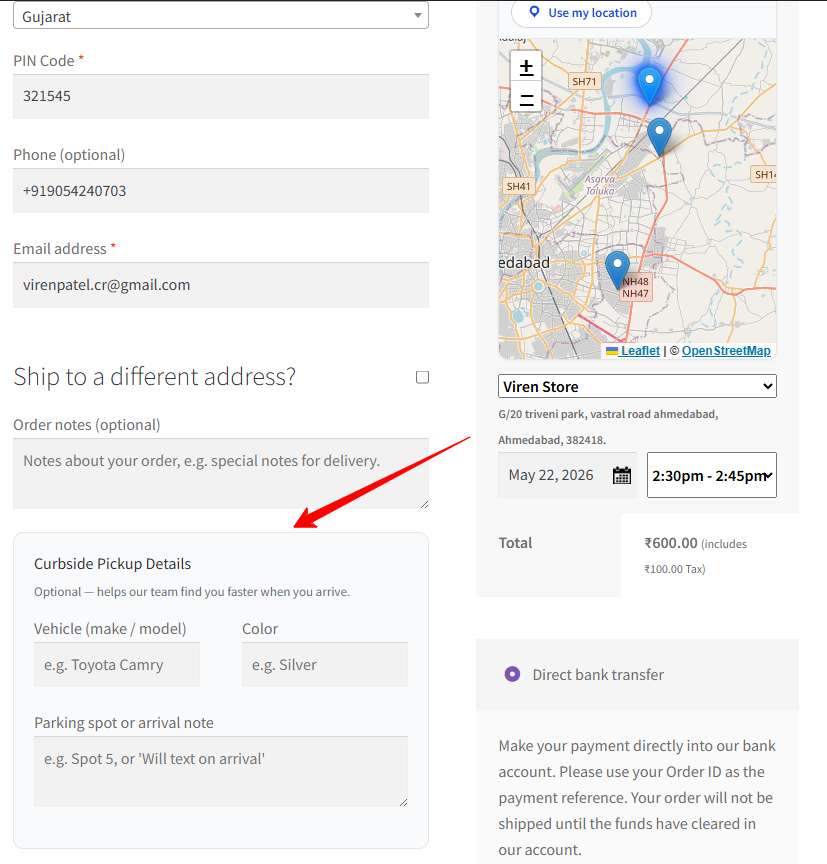
Step 2 — The customer adds vehicle details at checkout
When the selected pickup location has curbside enabled, a “Curbside Pickup Details” box appears at checkout. The fields are optional and help your team find the customer faster on arrival.
- Vehicle (make / model) — for example, Toyota Camry.
- Color — for example, Silver.
- Parking spot or arrival note — for example, “Spot 5” or “Will text on arrival”.
Step 3 — The customer taps “I’ve arrived”
The customer’s vehicle details are saved with their order and shown back to them on their order page. Once you mark the order as Ready for Pickup, an “I’ve arrived” button appears. When the customer taps it on arrival, your store is notified right away.

What happens when a customer arrives
- A note is added to the order recording the arrival time.
- An email is sent to your store letting staff know the customer has arrived, including the order number, customer name, vehicle details, and arrival note.
- The email is sent to the recipients set in the location’s Notifications section, so each store can route arrivals to its own team.
Good to know: The “I’ve arrived” button only appears once the order is marked Ready for Pickup, so customers can’t notify you before their order is prepared.