Requirements
- WordPress installed and running
- WooCommerce installed and active
- WooCommerce GeoLocation enabled (this is on by default in all WooCommerce installations — no additional setup needed)
INFO
WooCommerce GeoLocation is enabled by default in all WooCommerce stores. The CBR plugin uses it automatically without any extra configuration on your part.
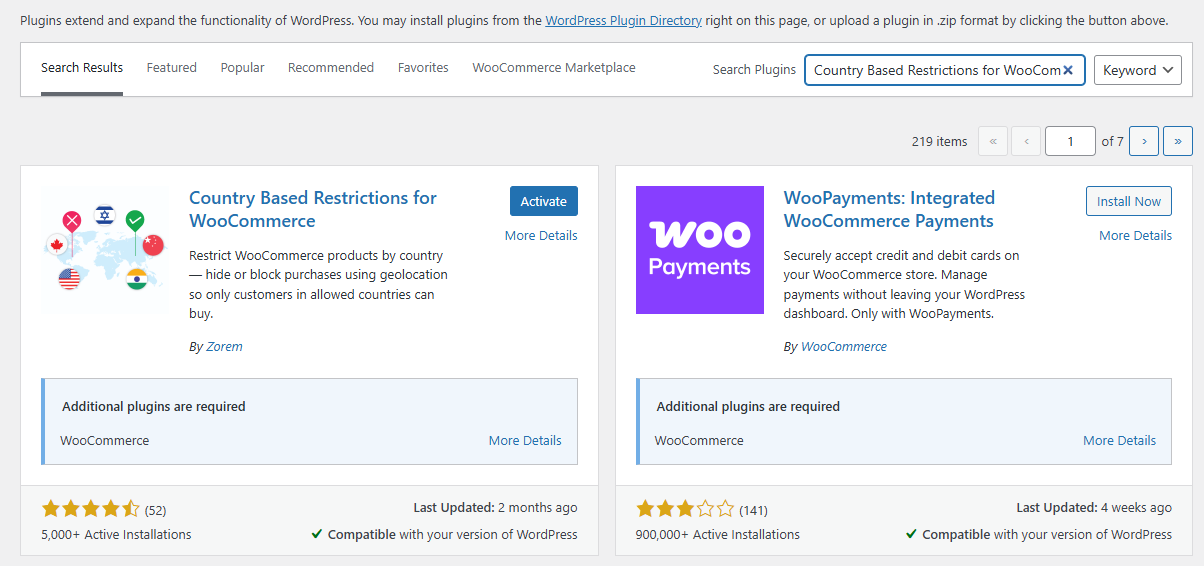
How to Install the Plugin (Method 1: From WordPress Admin Search)
This is the easiest method — no file download needed.
WordPress Admin → Plugins → Add New- In your WordPress admin — go to Plugins → Add New.
- In the search field, type: — Country Based Restrictions
- Find the plugin called “Country Based Restrictions for WooCommerce” by Zorem — in the search results.
- Click Install Now.
- Once installed, click Activate.
- After activation — navigate to WooCommerce → Country Restrictions to access all settings.
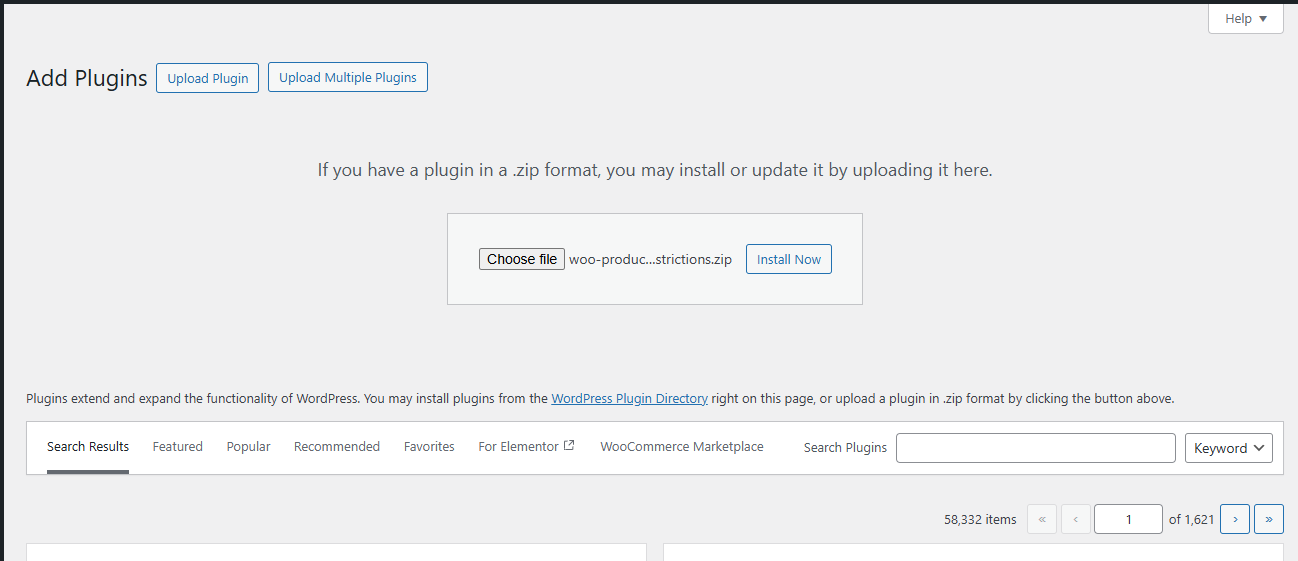
How to Install the Plugin (Method 2: From a .zip File)
WordPress Admin → Plugins → Add New → Upload Plugin- Download the plugin .zip file — from wordpress.org/plugins/woo-product-country-base-restrictions/.
- In your WordPress admin — go to Plugins → Add New.
- Click Upload Plugin — at the top of the page.
- Click Choose File — and select the downloaded .zip file.
- Click Install Now — then click Activate Plugin.
How to Access the Plugin Settings
Once activated, all settings are accessible from a single location:
WooCommerce → Country RestrictionsYou will find two main sections inside the Country Restrictions settings screen:
- Catalog Visibility Settings — choose how restricted products are displayed or hidden for customers from restricted countries
- Restriction Settings — configure Force Geolocation, the Debug Toolbar, the restriction message text, and message position
