Requirements
- WordPress 5.5 or higher
- WooCommerce 4.0 or higher, with a Local Pickup method enabled (see below)
- PHP 7.4 or higher
Block Checkout vs. Classic Checkout
WooCommerce has two different Local Pickup methods, and which one your store uses depends on your checkout page:
- Classic checkout (the [woocommerce_checkout] shortcode) — uses the zone-based Local Pickup shipping method you add to a shipping zone (steps below).
- Block checkout (the Checkout block, default in new stores) — has its own Local pickup setting (method ID pickup_location), managed in WooCommerce → Settings → Shipping → Local pickup.
INFO
ALP PRO supports both checkouts and both methods. If you’re not sure which checkout you have: edit the Checkout page — if you see a Checkout block, you’re on the block checkout; if you see the [woocommerce_checkout] shortcode, you’re on the classic checkout. Enable the Local Pickup method that matches your checkout, or restrictions and the location picker won’t appear.
How to Enable the WooCommerce Local Pickup Shipping Method
WooCommerce → Settings → Shipping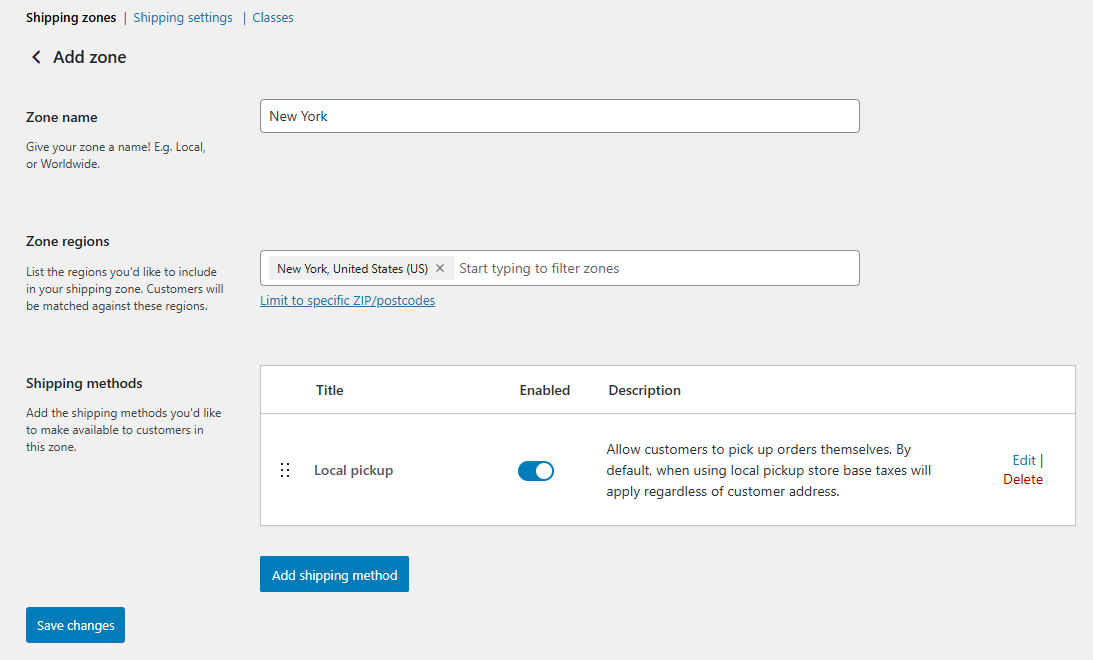
How to Install the Plugin
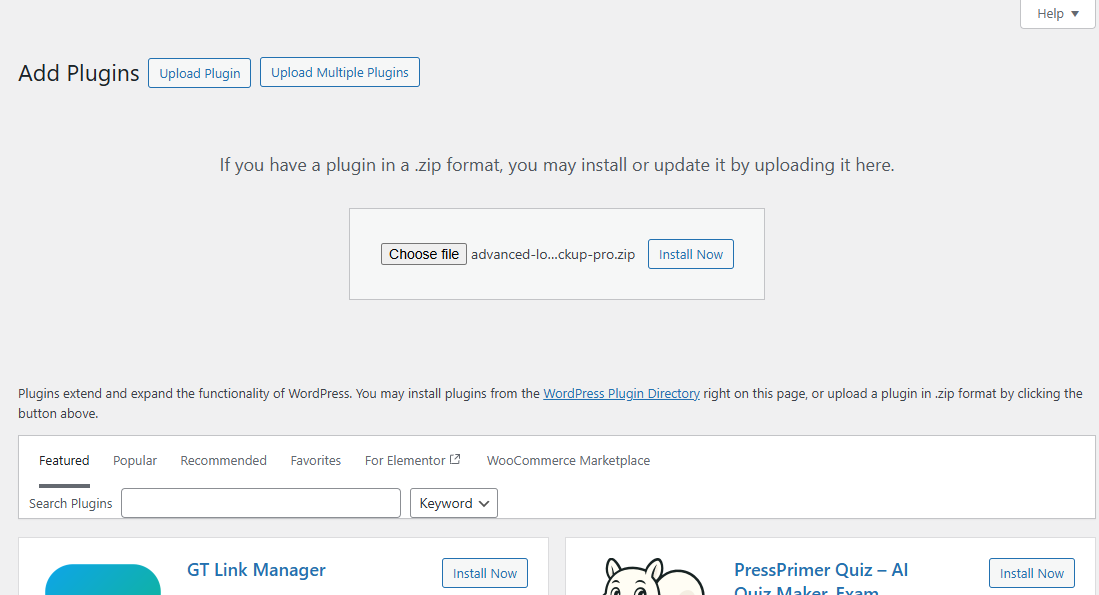
WordPress Admin → Plugins → Add New → Upload Plugin- Download the plugin .zip file — from the Subscriptions tab in your account at zorem.com/my-account/subscriptions/.
- In your WordPress admin — go to Plugins → Add New.
- Click Upload Plugin — at the top of the page.
- Click Choose File — and select the downloaded .zip file.
- Click Install Now — then click Activate Plugin.
- Navigate to WooCommerce → Local Pickup Pro — to access all settings.
INFO
ALP PRO runs independently of the free Advanced Local Pickup plugin. On activation it automatically deactivates the free version, and all free-version settings and pickup location data are preserved and carried over. You can safely delete the free plugin afterwards. Free plugin docs: docs.zorem.com/docs/advanced-local-pickup/
How to Activate the License
WooCommerce → Local Pickup Pro → License- In your WordPress dashboard — go to WooCommerce → Local Pickup Pro → License.
- Click Activate License — this redirects you to zorem.com to connect your store; confirm the activation for your store’s URL there.
- Once activated — the License tab confirms your license status and expiry date.

During activation you are redirected to your zorem.com account to confirm the connection for your store:
How to Deactivate the License
To move your license to another store (each license activates on one site at a time), deactivate it first:
WooCommerce → Local Pickup Pro → License → Deactivate LicenseYou can also deactivate a site from your account on zorem.com. When the license expires, the plugin keeps working, but updates and support stop until you renew.
Troubleshooting
- Local Pickup doesn’t show at checkout — check that (1) the customer’s address matches a shipping zone that has the Local Pickup method, (2) the method is enabled, and (3) you enabled the method that matches your checkout type — the zone-based method for the classic checkout, the Local pickup setting for the block checkout.
- The location list doesn’t appear — make sure at least one pickup location is enabled, and that the location’s product include list (if set) covers the products in the cart. See How to Set Up a Pickup Location.
- License activation fails — if the license is already active on another site, deactivate it there (or from your zorem.com account) and try again.
Next Steps
- How to Set Up a Pickup Location — add your first location.
- Setup & Configuration — display options, workflow, and checkout settings.
- How to Set Up Pickup Appointments — offer date and time slots.